
Shaping with Mesh Stitches
Now, if you know me then you know that I’m all about making Art that FITS! That means that I have to pay special attention to how garments are going to look on the body. I love working with filet crochet and mesh stitches. Many times you can find the written pattern or chart for these kinds of stitches but that does not often come with instructions on how to really build upon that. With just a few increases and decreases you can really elevate the look of a piece!
I’ve used simple increases and decreases in three really cool pieces over the years. Whether you’re working in flat, turned rows or in the round I’m going to give you a few tips and tricks to make your mesh fit.


The yellow pants have a super cute bell bottom as well as shaping on the hips and at the knee. The orange mesh skirt has shaping just for the hips. The Luv Me 2 Tits top (red) has shaping for the fitted cap sleeve. Just a few increases and decreases can make a world of difference in how the garment lays. More often than not I see crochet patterns that are basically just squares and rectangles. Which is fine if that’s the style that you’re going for, but in my case, I prefer a shaped fit over a boxy fit.
LET’S GET TO THE SHAPING.
The basic pattern for my favorite mesh stitch goes as follows:
Chain an even number of sts.
Dc in the 6th ch from hook, *ch 1, sk next ch, dc in next ch* repeat across row ending on a dc.
***I like to do a modified dc to begin each row. After completing a row, turn your work, insert hook into top of first dc and make a sc. Insert hook into vertical bar made from sc and make another sc.
Then continue in pattern ch 1, skipping next st, and dc on top of dc from previous row.
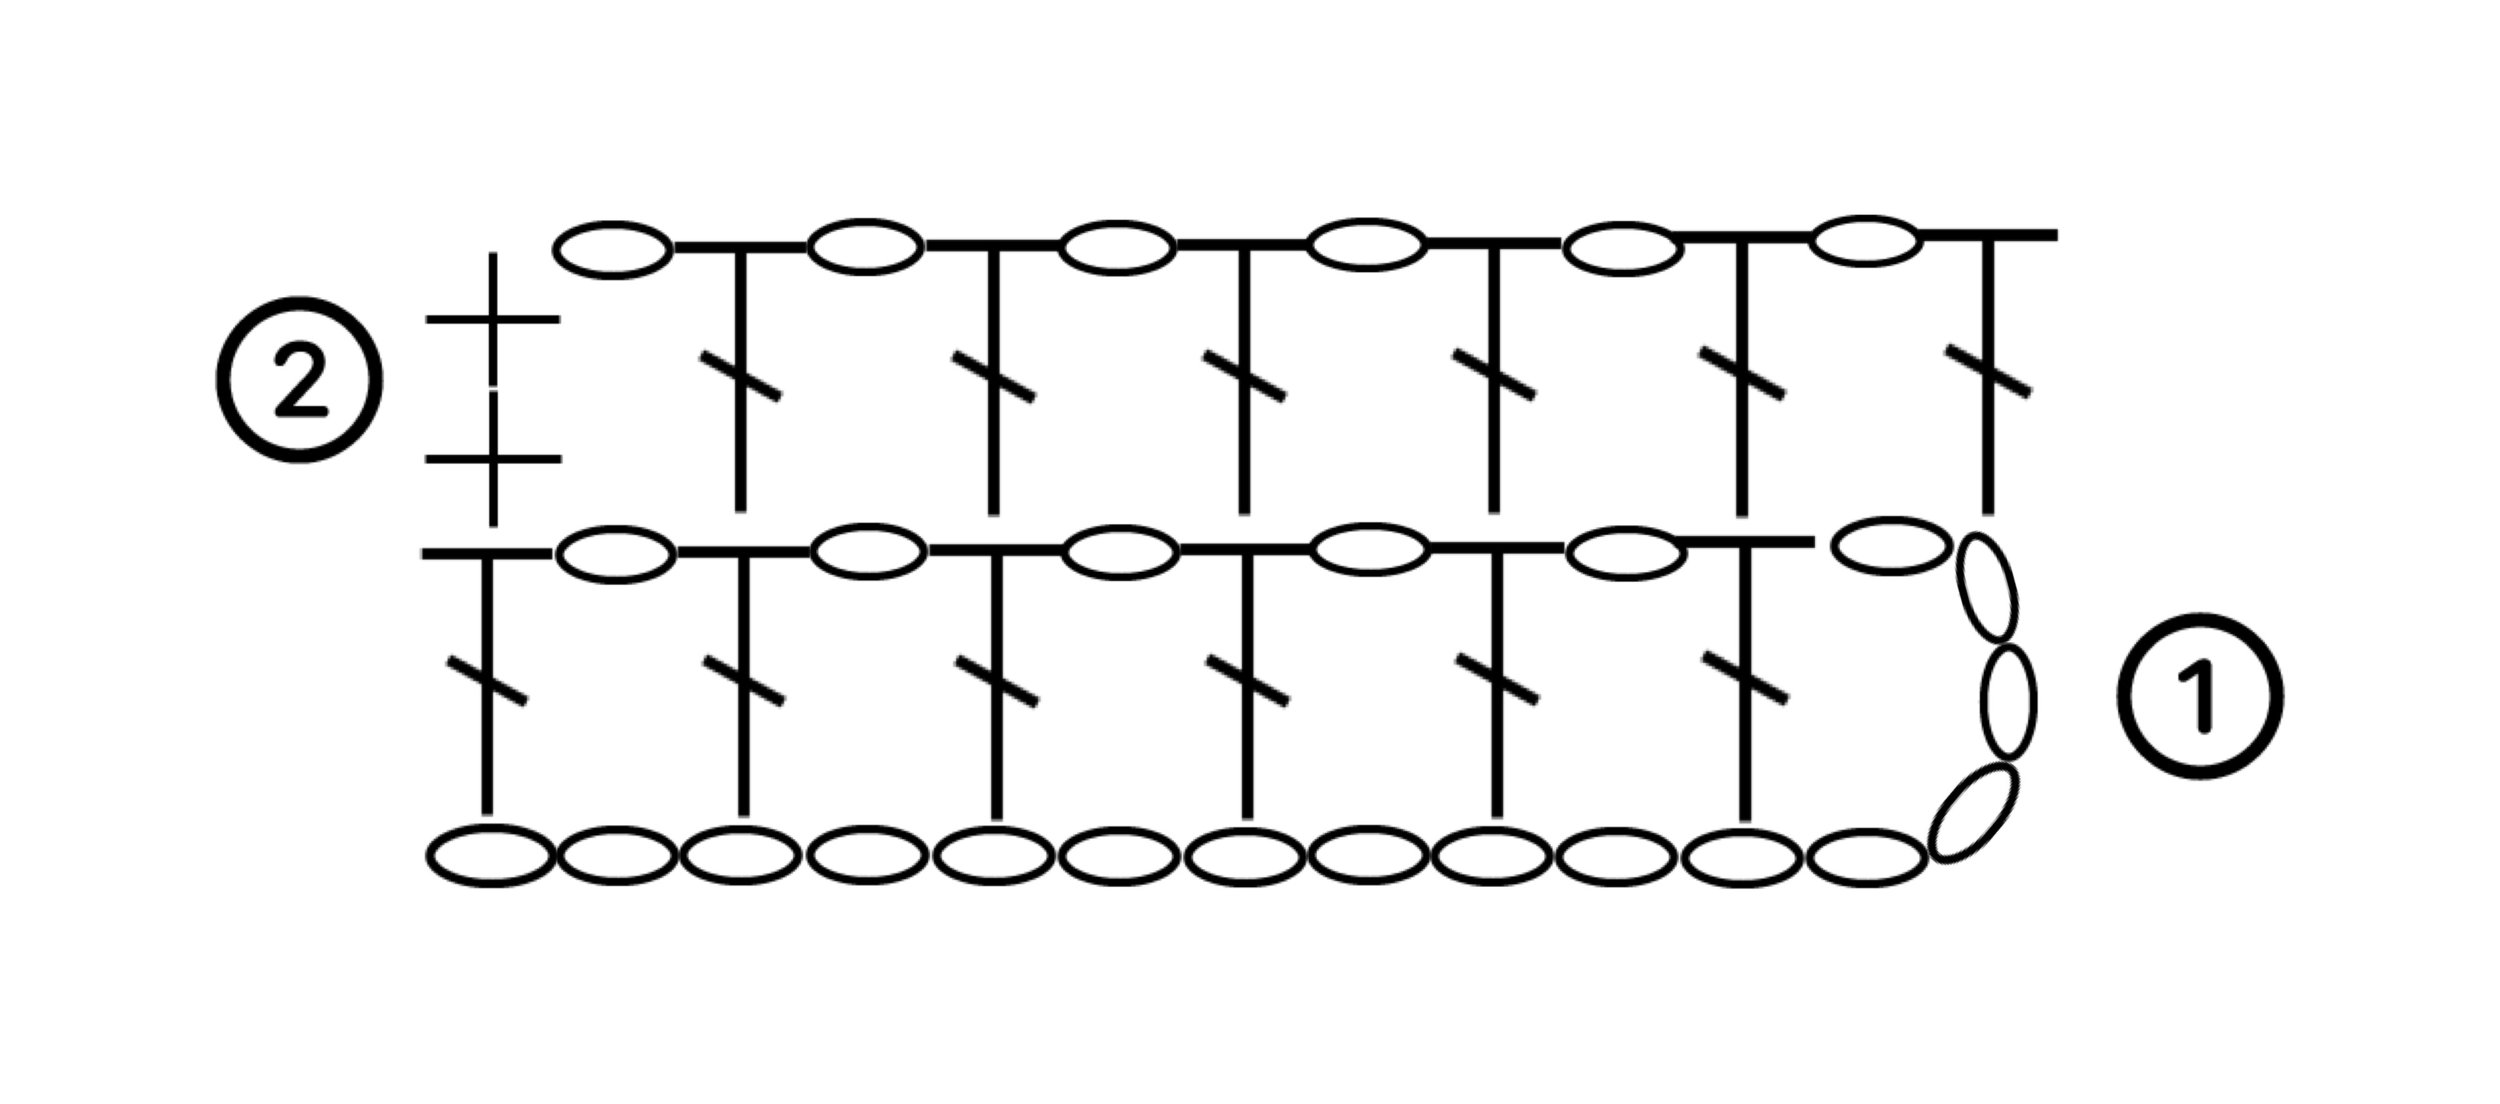
The two sc’s at the end of row 2 represents the modified dc.
INCREASES: Dc in next st, ch 1, dc again into same st, continue in pattern. The increase can be places anywhere.
DECREASES: Yo, insert hook into next st, yo, pull up a loop, yo, pull through two loops, (2 loops left on hook) yo, insert hook into next st, yo, pull up a loop, yo, pull through 2 loops, yo, pull through all 3 loops. The decrease can be placed anywhere.
**This is essentially a dc2tog. You will be decreasing in the next 2 dc skipping over the ch in between.
***Also note that these increases and decreases are very visible. Because the stitch is open there is not where for the shaping to hide so embrace it.